How to Set Up Paxton Solo: Complete App and Installation Guide
Step-by-step guide to setting up the Paxton Solo access control system. Real screenshots from our Chicago office install — controller pairing, NFC tag registration, and user management.
Setting up the Paxton Solo took me about 15 minutes from unboxing to first unlock. And I'm including the time it took to find a Phillips screwdriver. If you've ever struggled with configuring a Net2 system or spent an afternoon on a Brivo site survey — Solo is gonna feel like a vacation.
Heres the complete walkthrough with screenshots from the actual setup at our Chicago office.
Step 1: Download the Solo App
Grab the Paxton Solo app from the App Store (iOS) or Google Play (Android). It's free. The app is separate from Paxton's Net2 or Connect apps — Solo has its own dedicated application. Smart move by Paxton because it keeps things focused and uncluttered.
Create your account with an email and password. This becomes your admin account for the system. You can add more users later.
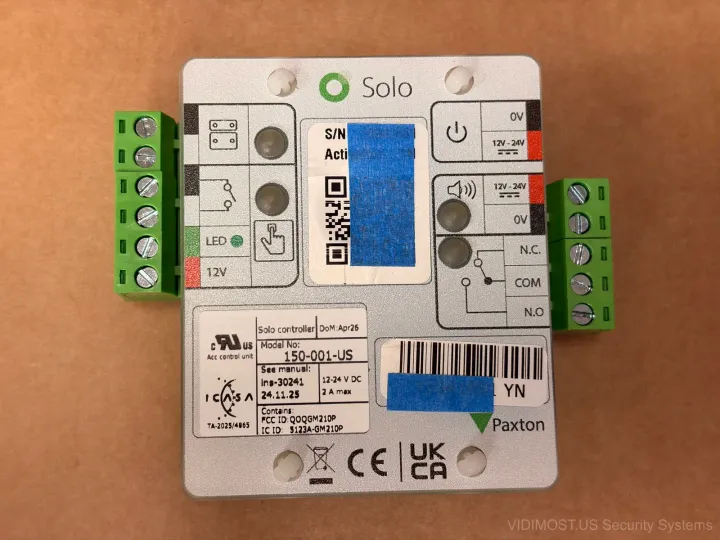
Step 2: Power Up the Controller
Plug in the included 12V power adapter. The LED on the controller should light up. Thats it for power — one plug, one outlet. If you're mounting in a closet or above a drop ceiling, just make sure theres an outlet nearby. Most Chicago buildings have outlets in utility closets so this usually isnt a problem.
For permanent installation, you'd wire the controller terminals to your electric lock. But for initial setup and testing, you dont even need the lock connected. The app will confirm everything works before you start drilling holes.
Step 3: Name Your System
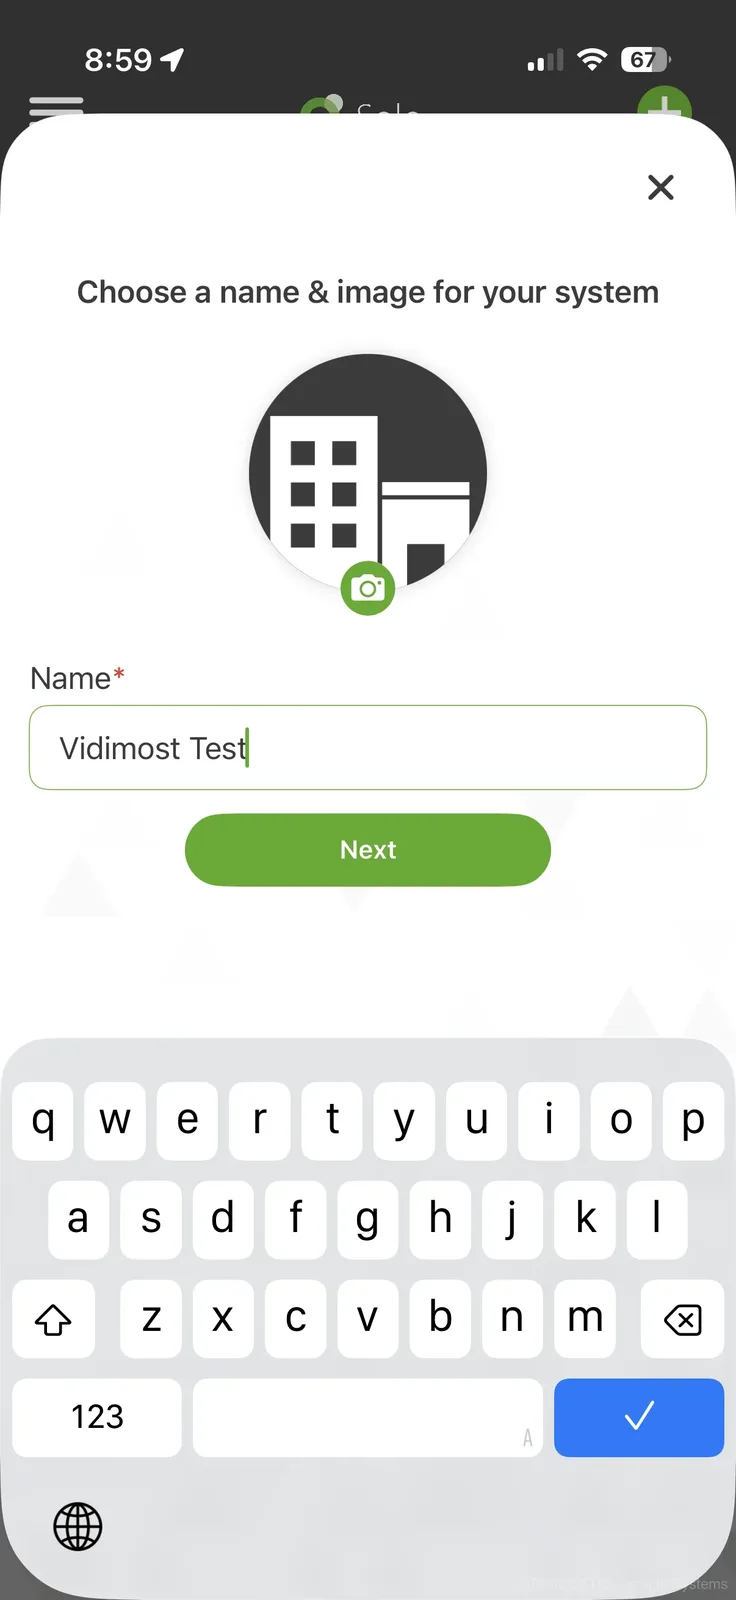
The app asks you to name your system and optionally add a photo. We named ours "Vidimost Test" because creativity peaks at 9 AM on a Tuesday.
The name is just for your reference in the app — it doesnt affect functionality. If you're managing multiple Solo systems (say, front door and garage), descriptive names help keep things straight.
Step 4: Find the Controller
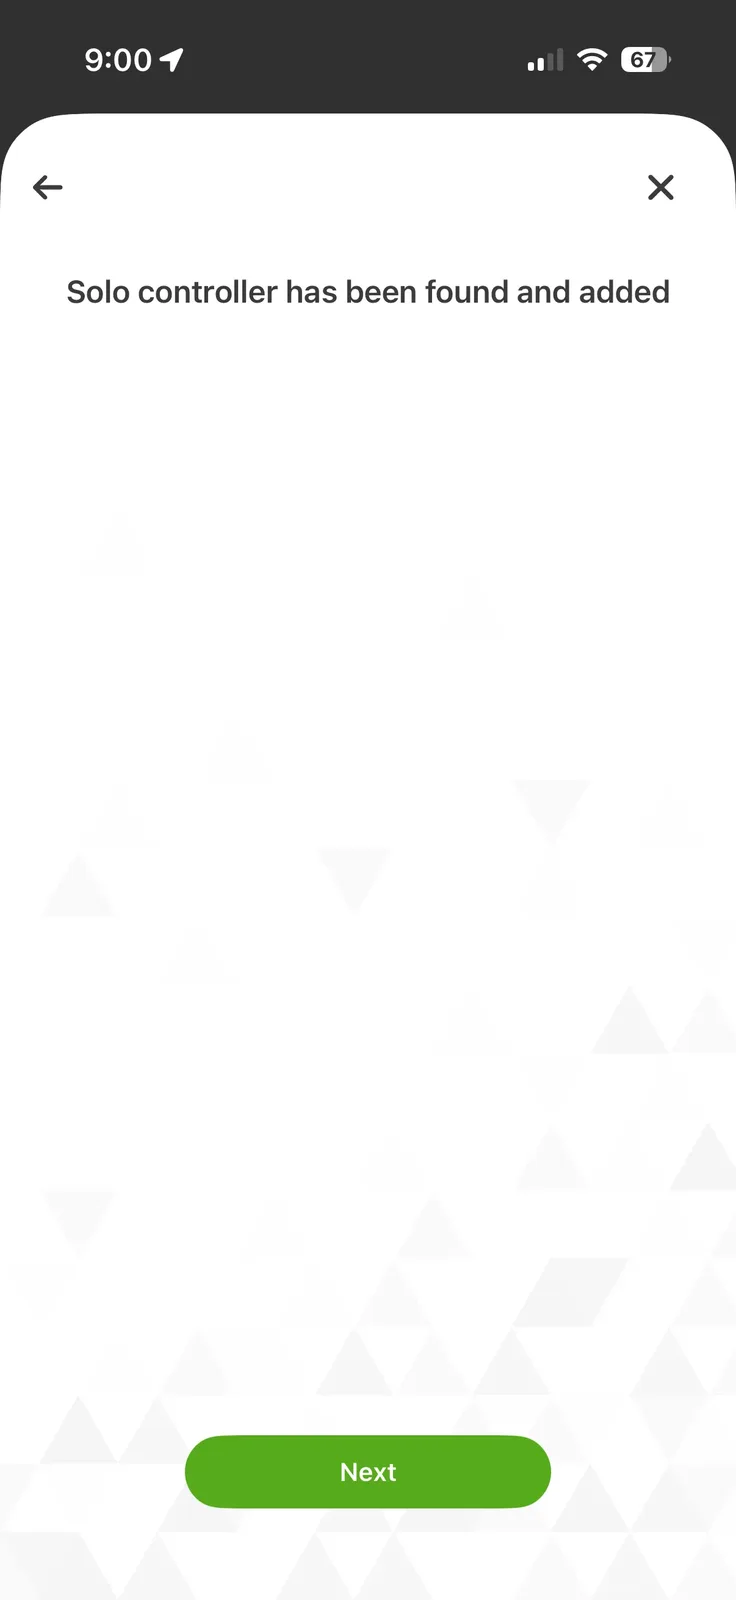
The app scans for nearby Solo controllers via Bluetooth. Ours popped up within 3 seconds. Tap it to pair.
No IP addresses. No network configuration. No DHCP reservations. No port forwarding. The entire system runs on Bluetooth between your phone and the controller. If you've ever had to explain subnet masks to a building manager on the North Side... you'll appreciate this.
Step 5: Name Your Door
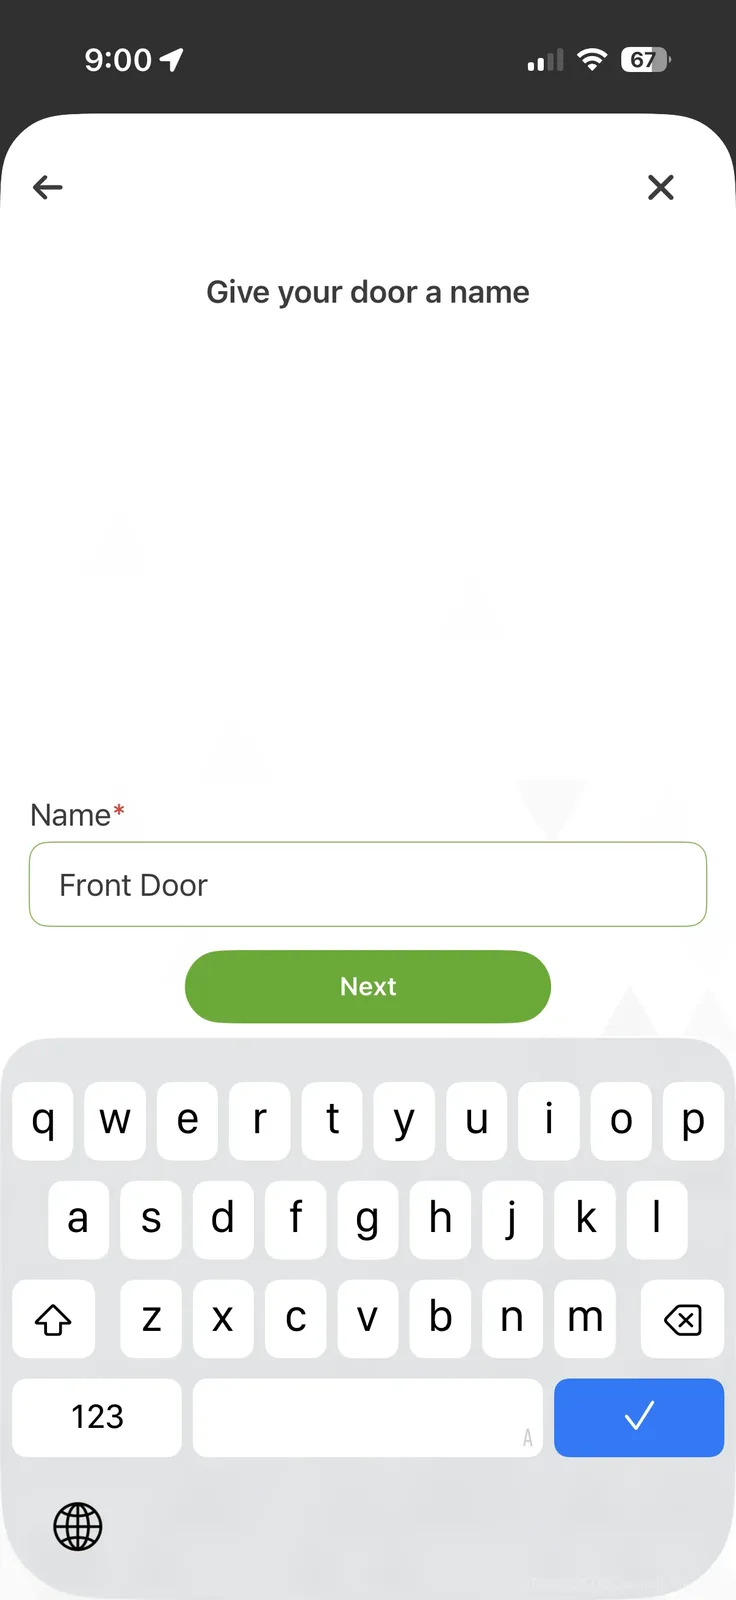
Each controller manages one door, and you name it here. "Front Door," "Office Entry," "Garage Side Door" — whatever makes sense for your setup.
Step 6: Set Your Timezone
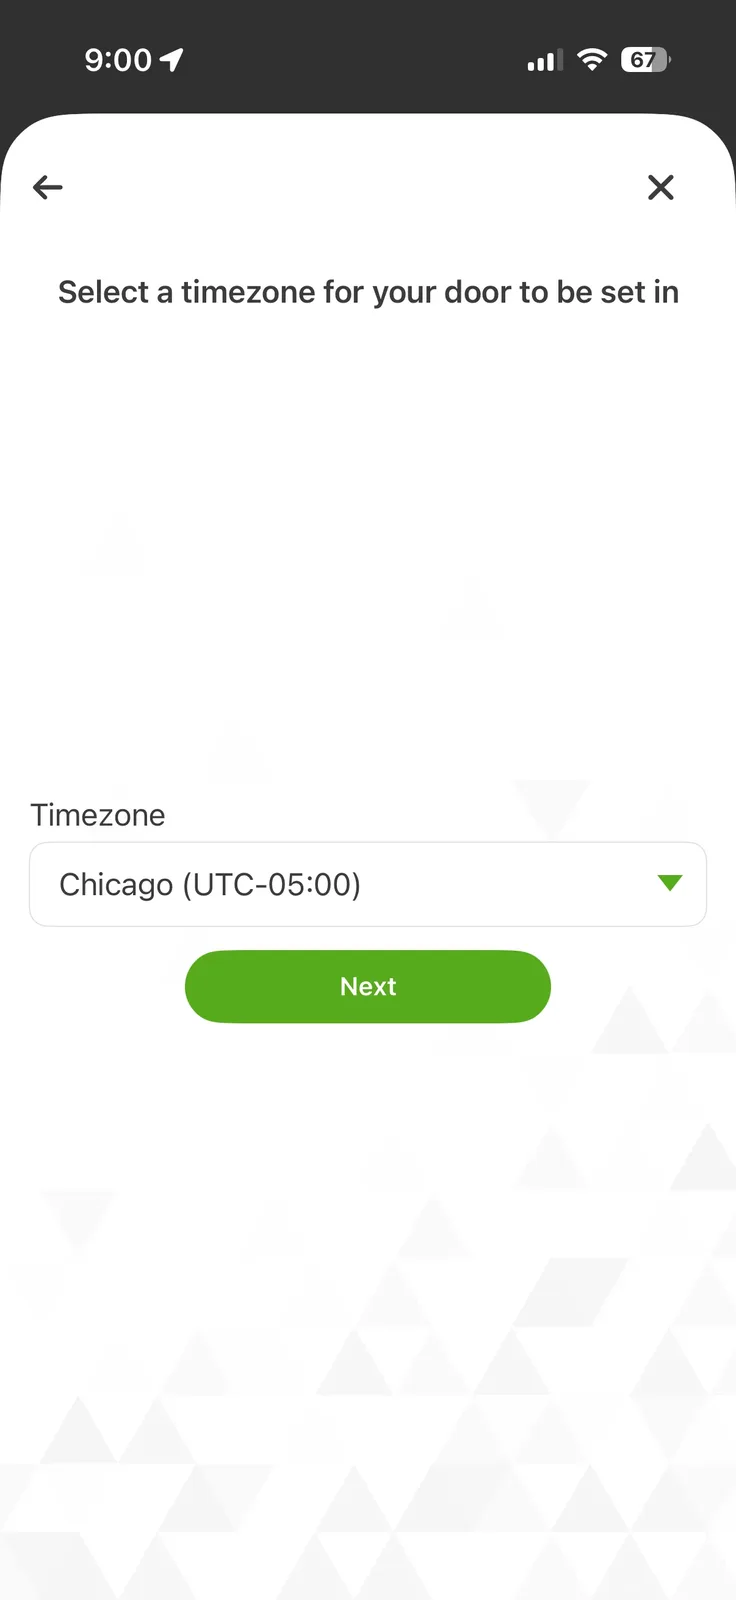
Pick your timezone. For us thats America/Chicago (Central Time). This syncs with the real-time clock chip on the controller board and determines when time-based access rules kick in.
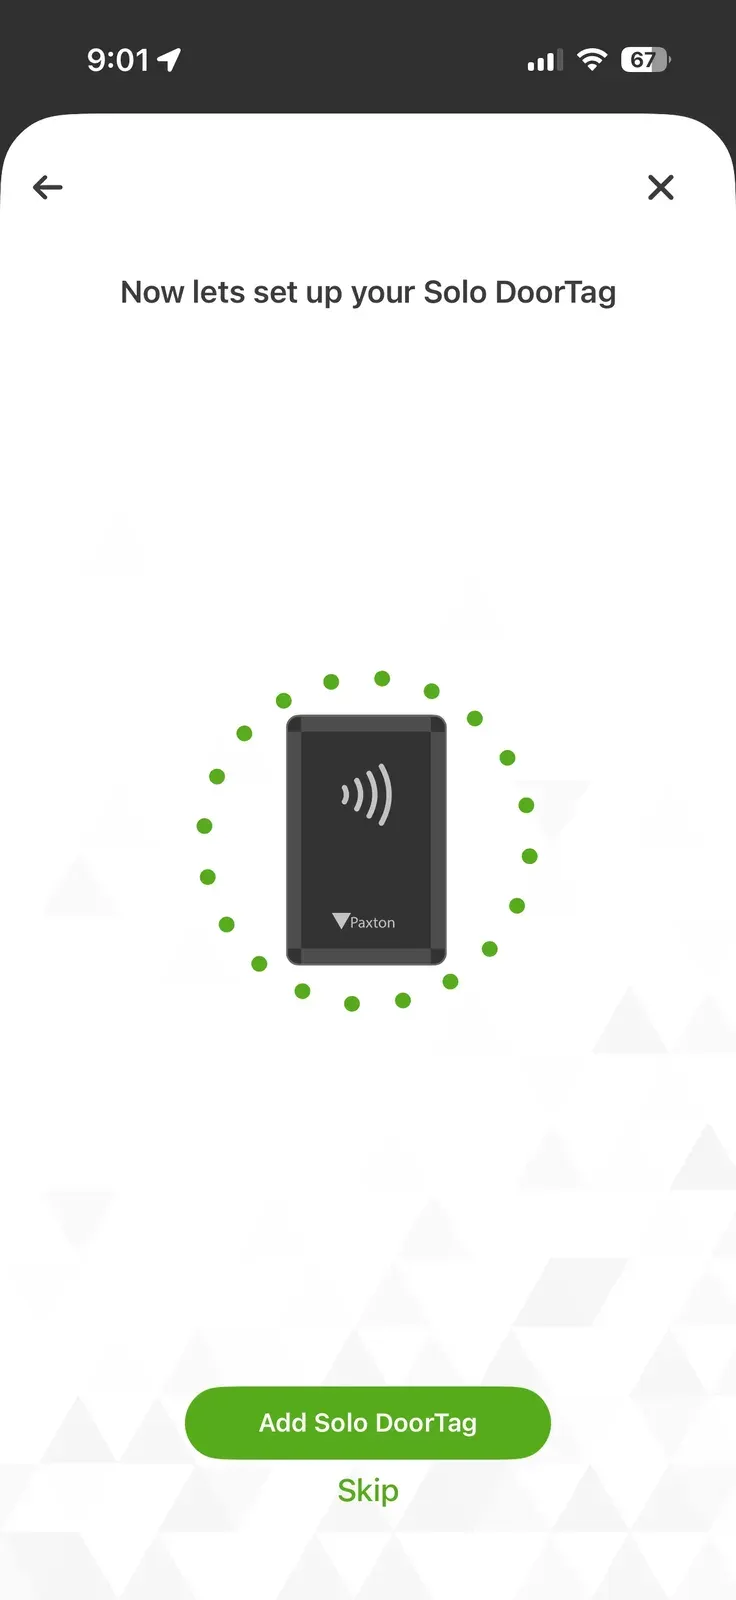
Step 7: Register the Solo Tag
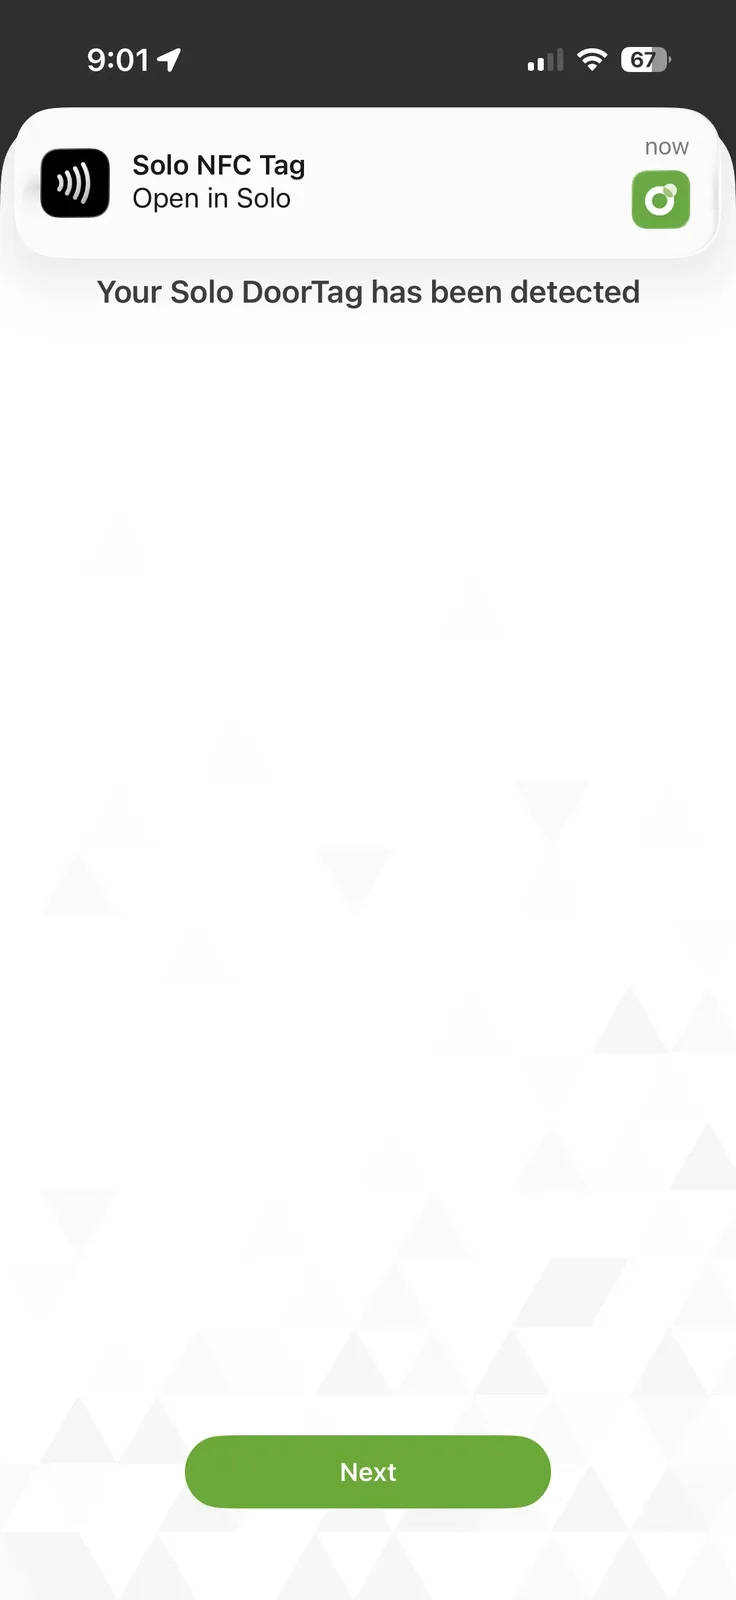
Now the fun part. The app asks you to hold your phone against the Solo Tag. Your phone's NFC reader picks up the tag's unique ID and registers it to the system.
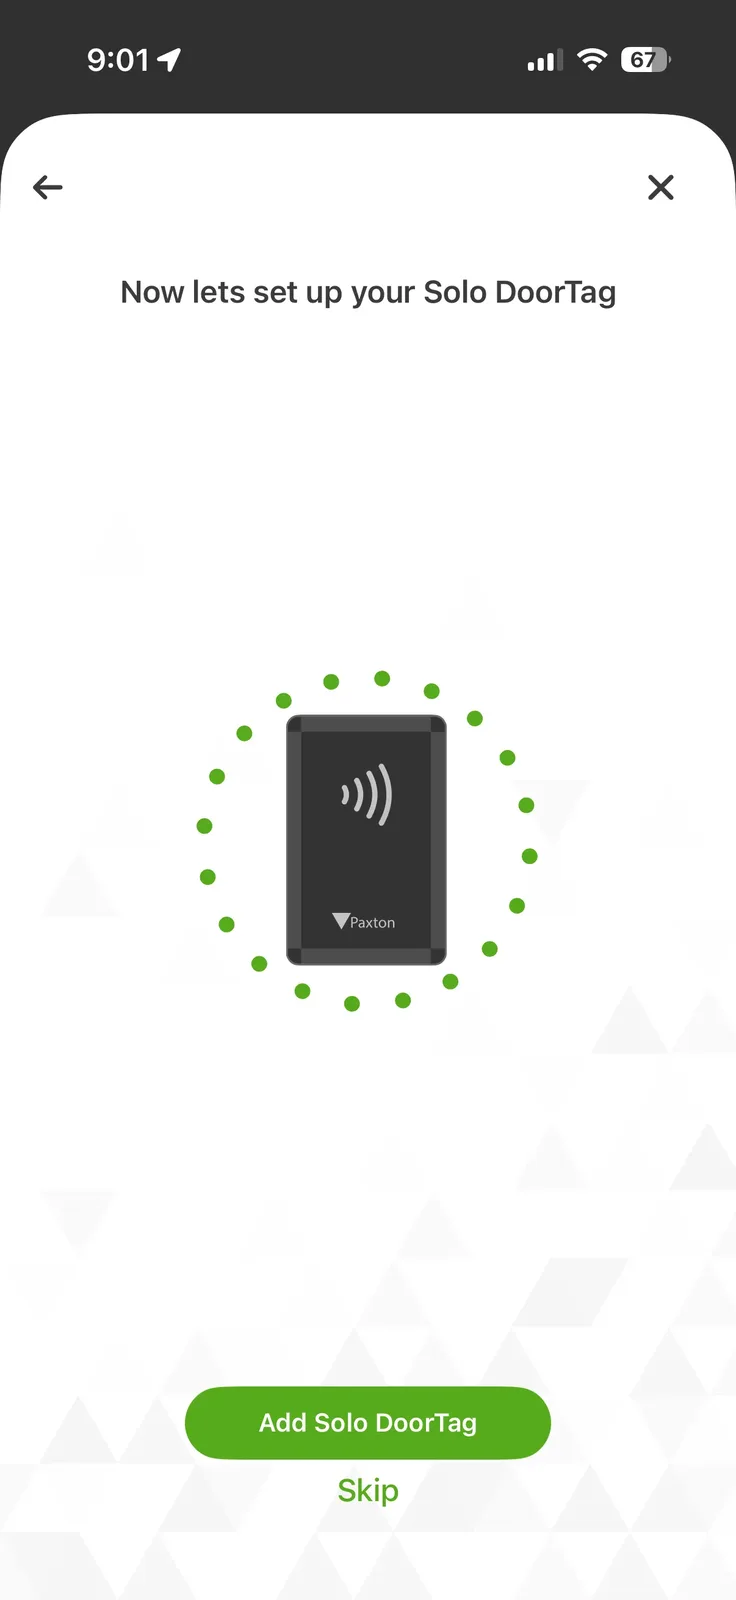
Once registered, this specific tag is linked to this specific door. The tag is just a passive NFC device — it has no memory of users or permissions. All that logic lives in the controller and syncs via your phone.
Step 8: Create Your Passkey
The final setup step creates your personal Passkey. This is essentially your digital key — an encrypted credential stored on your phone that proves you're authorized to open this door.
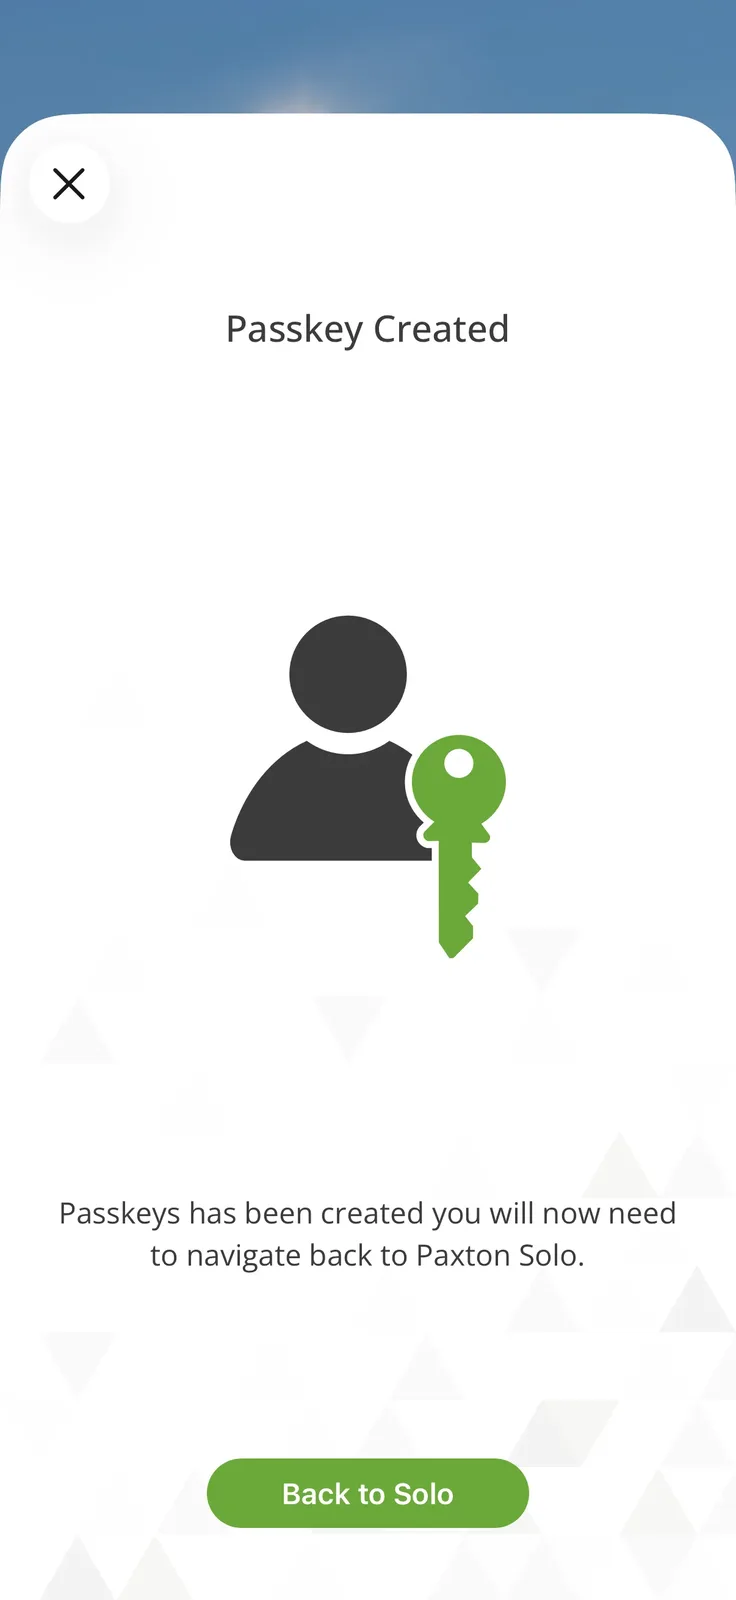
The Passkey is tied to your phone and your account. You can't copy it or export it. If you get a new phone, you re-register through the app. Security-wise this is solid — its essentially the same model that mobile access credentials use in enterprise systems, just packaged in a much simpler wrapper.
Step 9: Test the Unlock
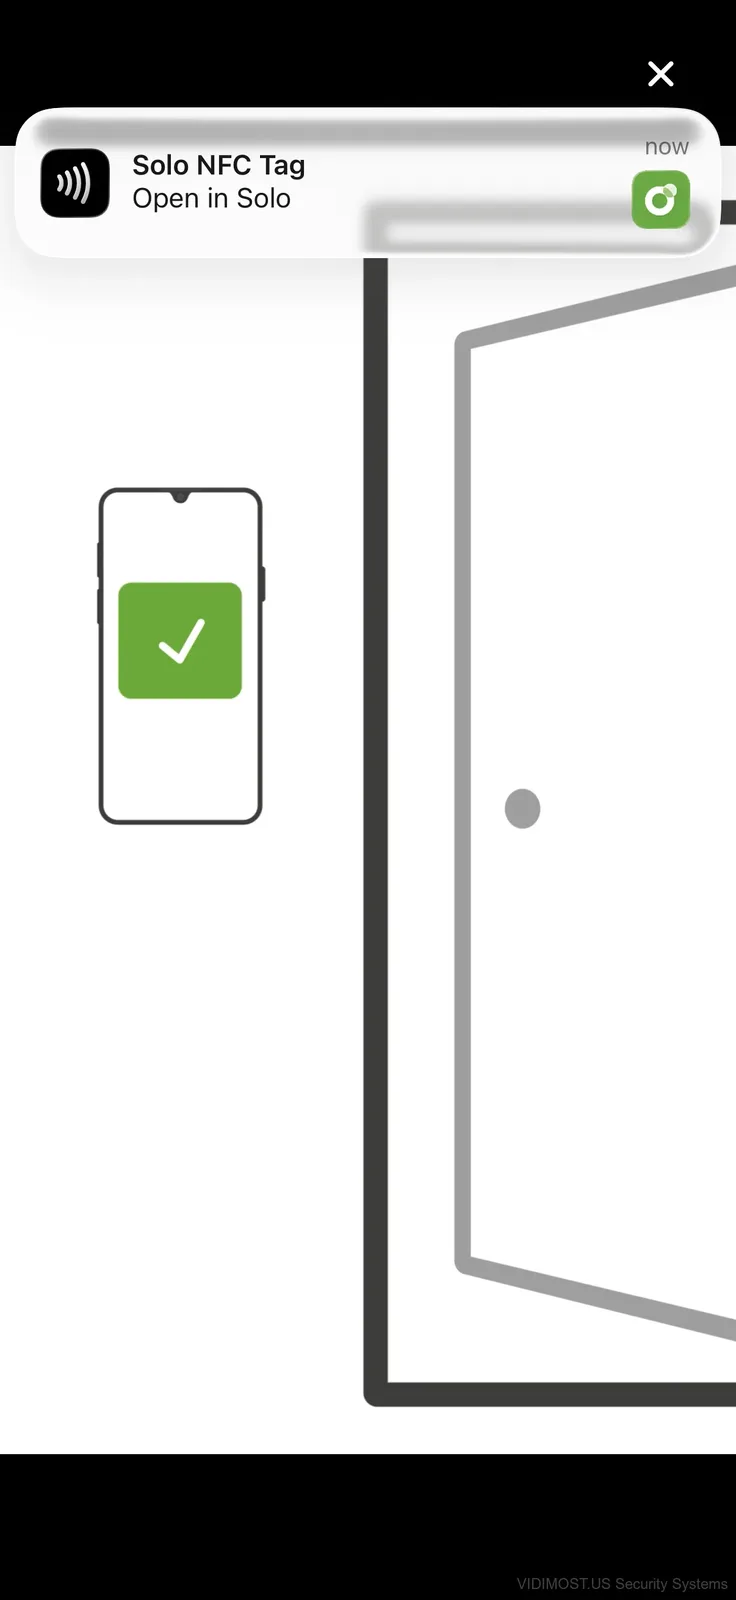
Hold your phone against the tag mounted on the wall. The app shows "Solo NFC Tag — Open in Solo" notification, then the door animation plays with a green checkmark. You should hear the relay click in the controller. Done.
The whole thing takes under 2 seconds. And honestly? It feels kinda magical the first time. Like somebody from the future handed you a key that doesnt exist physically.
Adding More Users
To add someone, go to Users in the app, enter their email, and send an invite. They download the Solo app, create their account, and scan the tag with their phone. The controller automatically syncs their credential.
You can set time-based access (Monday-Friday 8AM-6PM for example) or give full 24/7 access. You can also revoke access instantly from the app — no need to physically be at the door or change locks. Way better than dealing with lost key fobs.
Tips from Our Installation
- Mount the controller close to the door — Bluetooth range through drywall is about 10-15 feet, less through concrete or metal (pretty common in older Chicago buildings)
- The tag sticks to the wall with adhesive but you can also screw-mount it for permanence
- Keep the tag at chest height for comfortable phone tapping — around 48 inches from the floor
- If you're connecting an electric strike, make sure it matches the controller voltage (12V or 24V)
- Test everything before you close up the ceiling tiles or cable raceways
The whole process from unboxing to working door access took us about 15 minutes. Most of that was naming things in the app and taking screenshots for this article. The actual technical setup — power, Bluetooth pairing, tag registration — was maybe 5 minutes.
For a deeper look at whats happening inside the hardware, check the Solo teardown article. And for the overall product review including pricing and limitations, see the Paxton Solo review.
Want Solo installed professionally at your Chicago property? Our team handles everything from wiring to app configuration. Free consultation for Chicagoland locations.

Comments ()